Connection management page
As you may have many environments (Staging, Production, …), we’ve created an easy way to manage your different connections.
In the Dataggo Platform, you can find a “Connections” menu :
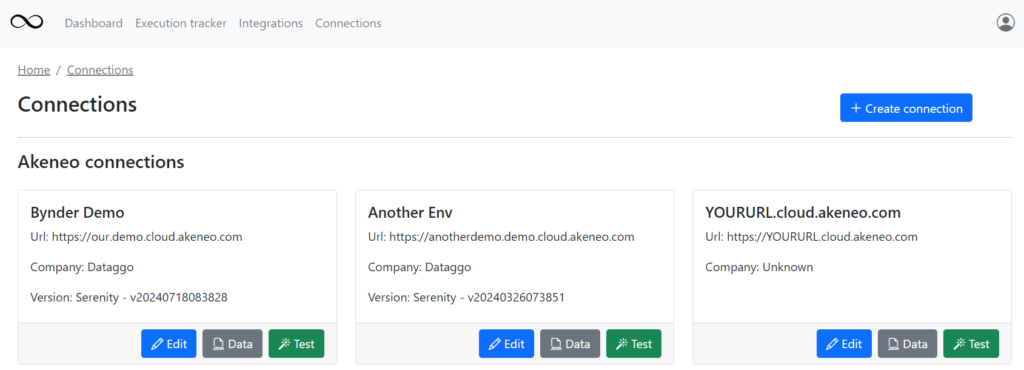
You can here create, modify, test your connection.
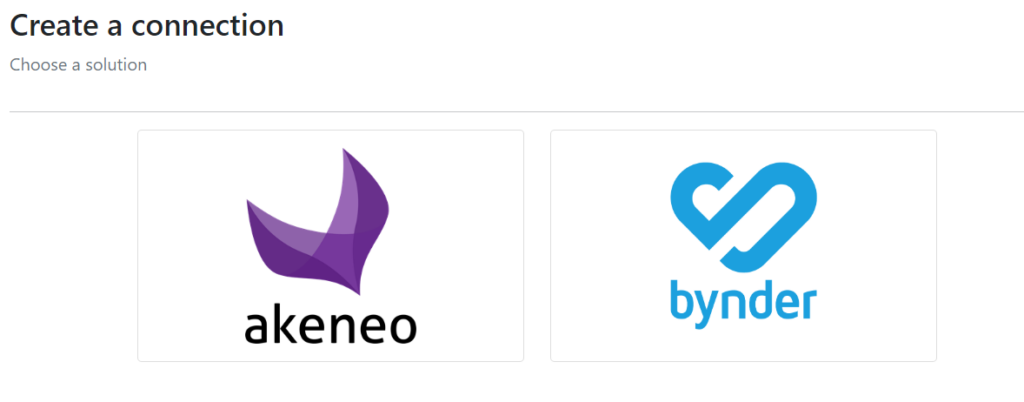
When you want to create a connection, click on “+ Create connection”. You will have the choice for the app you want to create a connection too.
See below for more explanation.
Connection with Bynder
To connect your application to Bynder, you have 2 possibilities:
- Use permanent Token (mandatory for your staging environment)
- Use OAuth credentials (recommended for production environment)
Permanent Token for Bynder
For Bynder permanent token, you can find a dedicated page here:
OAuth connection for Bynder
This option can be used ONLY for production environment.
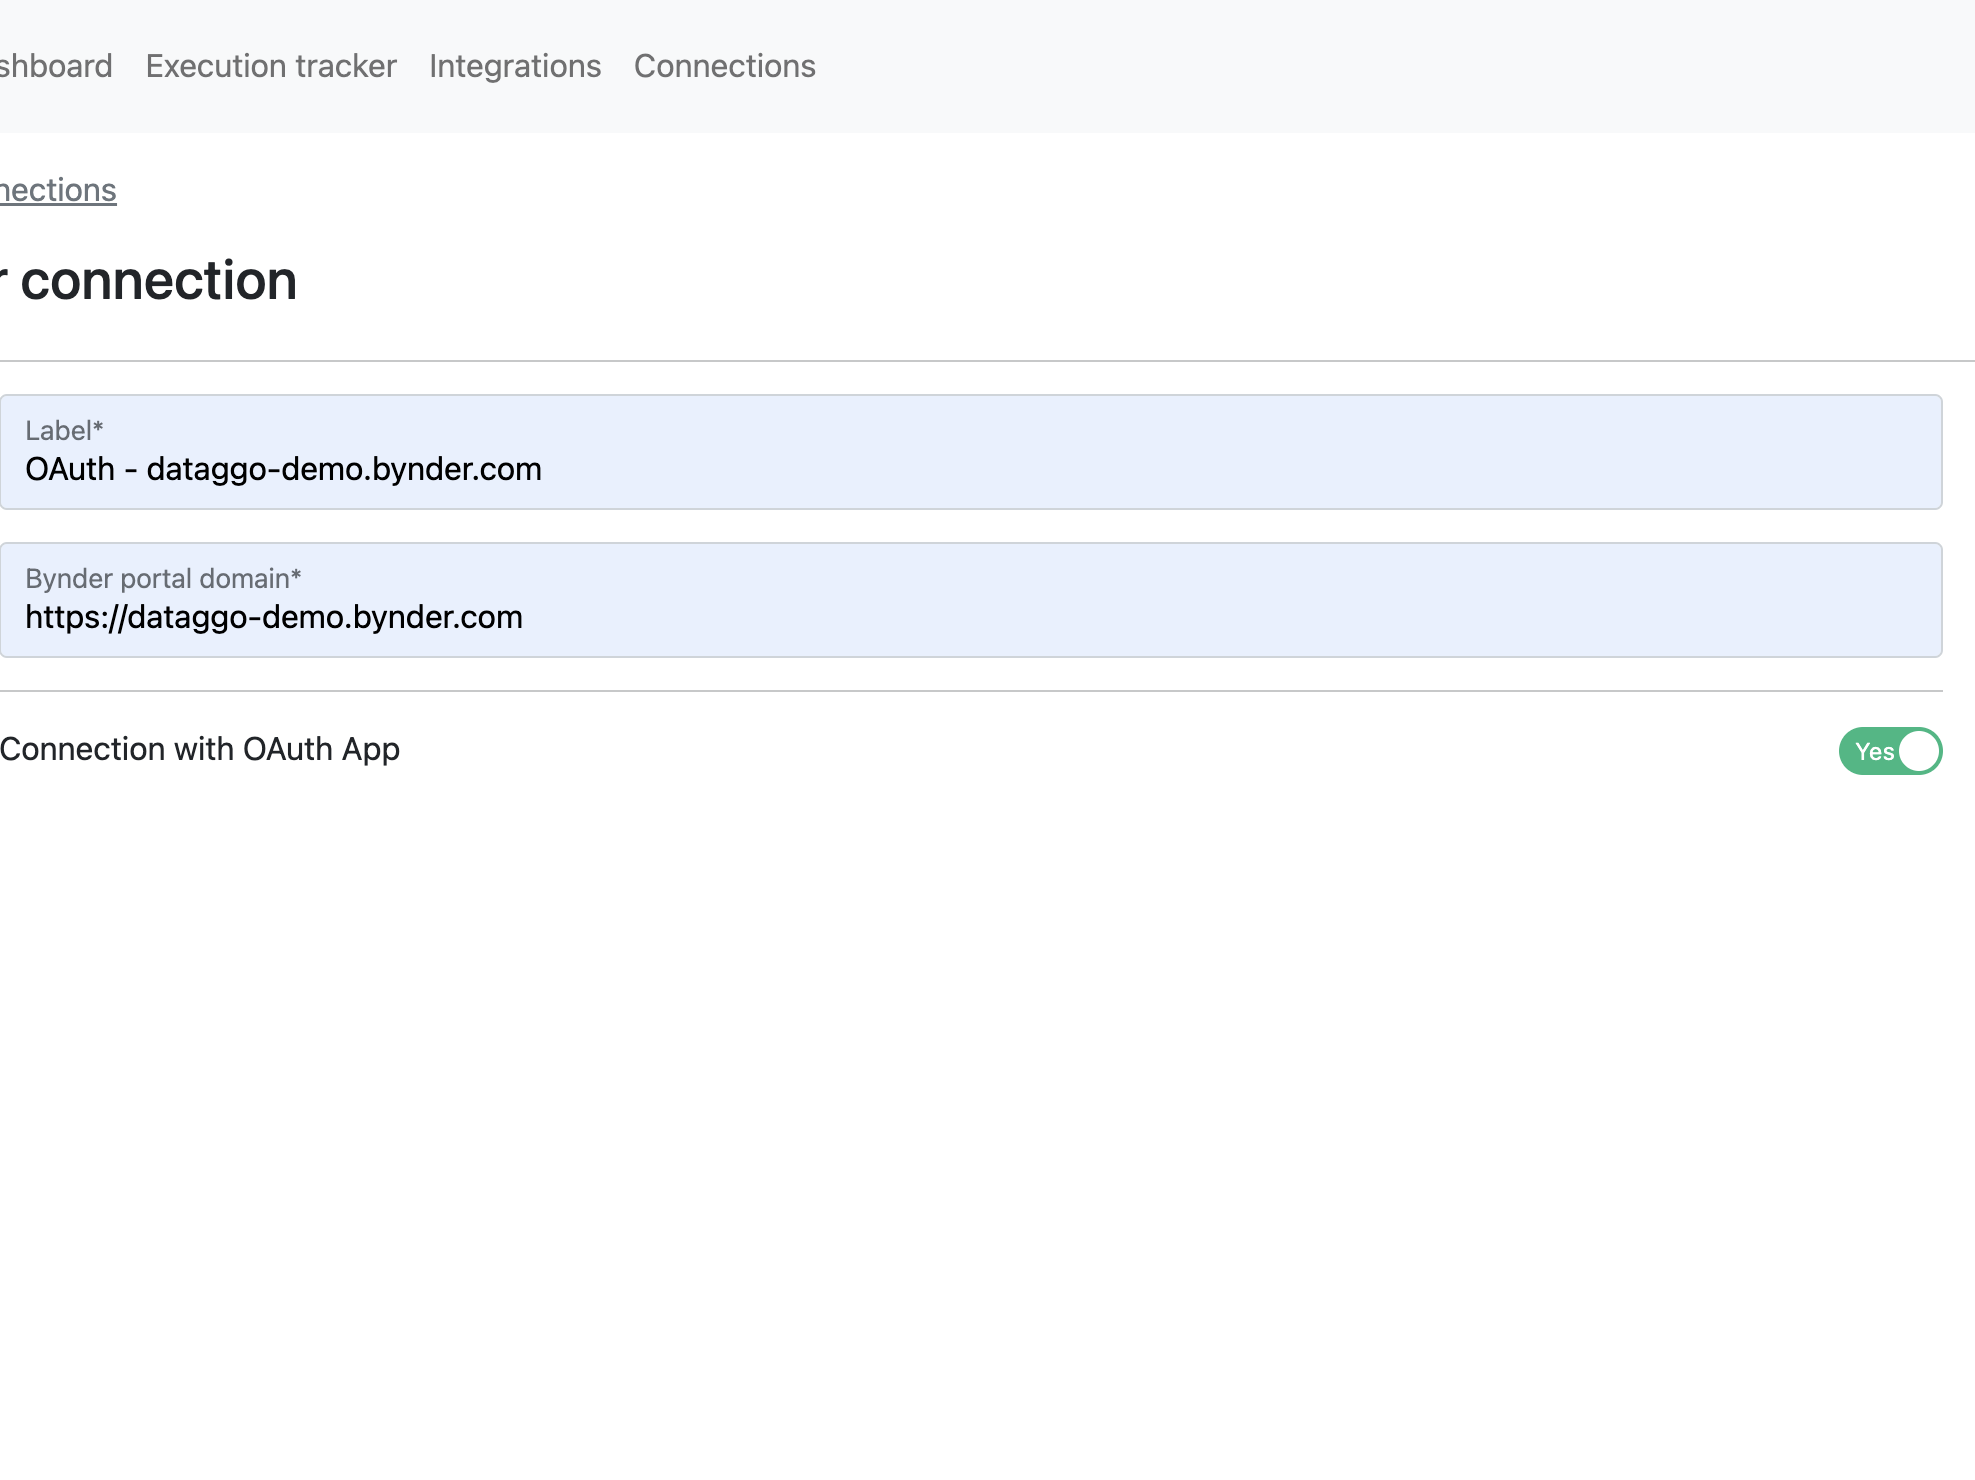
After choosing “Bynder” when you clicked on “+ Create connection”, you must fill your label and URL.
You must click on the Yes for the option “Connect with OAuth app” :
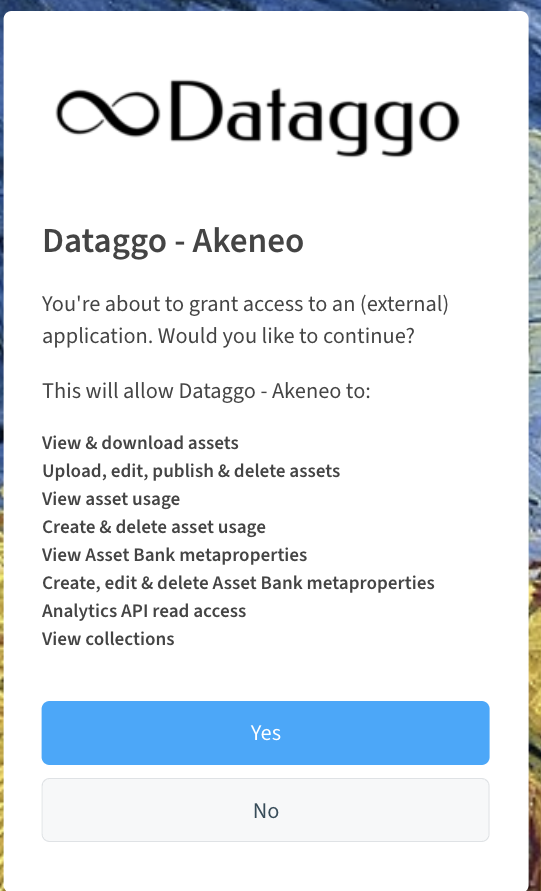
When saving ,you will be redirected on your Bynder portal were you must accept to grant access:
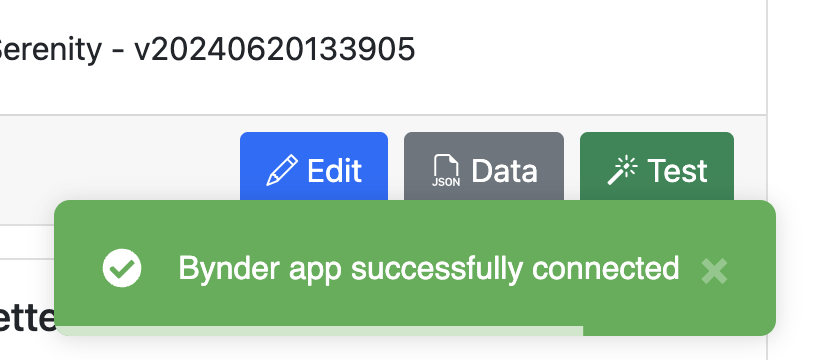
After accepting, you will be redirected on the connect platform where you will see a success message:
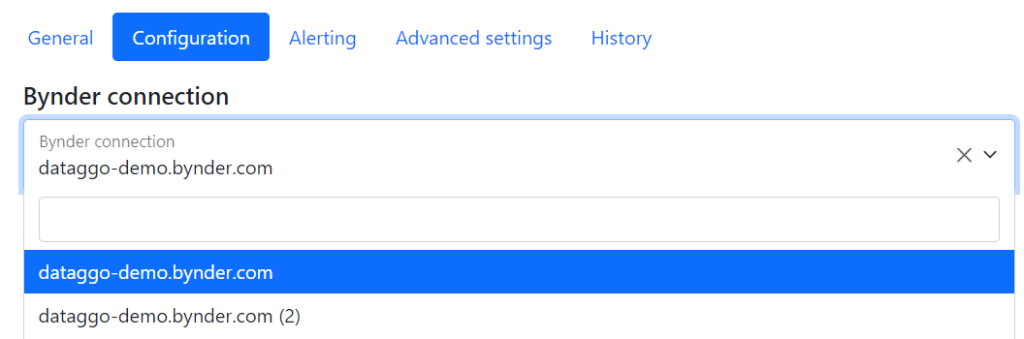
After that step, you must go in your jobs and select the desired connection.